Tag Archives: SC1

edgertronic firing on all cylinders!

edgertronic

One of our favorite high speed camera companies has shared a lot of information regarding it’s COVID pandemic operations as well as unit shipments for their cameras. It looks like Sanstreak corp the parent of edgertronic is considered an essential business to the government which is probably because of the support and software development they do with clients for important government agencies. They have sold thousands of cameras to date and the company seems to be on firm footing to continue solidly into the future.

Their product line has the SC1, which is the 700fps 720p camera that started it all, as well as the SC2/SC2+ 720p at over 4000fps and SC2X over 2000fps at full HD 1080p. Check our page here for full in-depth reviews on these three cameras. Our favorite the SC2X is capable of a beautifully detailed and artifact-free image that can be used for cinema and broadcast. The SC2+ has the edge in frame rates with speed as a primary focus being able to record 6x the frame rate of the original edgertronic. The cameras have Color and Monochrome options if needed. → Continue Reading Full Post ←

edgertronic SC2+ Review – Part 3

edgertroinic SC2 Plus Review Verdict

Over the last four weeks testing and shooting with the edgertronic high speed camera we have a complete sense of the capabilities, strength and weaknesses that make up this kit. The portability of the setup with wireless router connectivity makes it a joy to go out and shoot nature and locations out of the studio.

Part 3 of this review will focus on the camera’s portable setup capability.   We will also go into a recent features introduced since the edgertronic SC1 was reviewed last year and things still left to add into the platform plus, a conclusion for the entire review.

Being portable can be done with any Laptop connected to the camera Ethernet directly but unless you have a full rig support it becomes an exercise in frustration to carry a laptop all day. You will need a surface to support the computer while working in the field. That is not a problem for indoor use but for outdoor it becomes a harder setup to use and cabling can get in the way.

WiFi Router Wireless Setup:

The first idea was to create a wireless setup for the edgertronic that would let the camera be controlled by an un-tethered terminal computer.

By Connecting the edgertronic to a wireless router via an Ethernet cable we were able to control the camera from a WiFi setup by a Laptop or even a Tablet computer capable of running Google Chrome browser.

The delay came at about 1.3-1.4 seconds, so any adjustments in focus or position would be quick.  Be advised that the camera connected straight through an Ethernet cable to a PC or Laptop has about a 1 second delay.  So adding .3 or .4 seconds to form a wireless control machine is not bad at all.

At times the feed went down close to 1.1 seconds or close to par with a direct Ethernet connection. This was affected by distance, signal range and or position of the laptop or tablet. By using a Wireless N router we were able to have a consistent feed through a couple of walls and over 100ft without disconnections.  The camera was easily controlled and could be used from a different location within the range.   By using a 50ft Ethernet cable it was easy to connect the camera to the wireless router which was plugged far away.  By freeing the camera from a short tether it becomes a much more versatile tool.  You also have to think about power cords or portable batteries.  We went with the bescor power pack with 12v car adapter.  It gave us about 6.5hrs of continuous camera use.  After it ran out of juice the recharge was done over night.  Amazon has the battery kit with charger for under $80 here!

Another recent battery option is the Paul C Buff Vagabond Mini $239.95 MSRP. Which lets you power devices via standard AC Plug like your Laptop, charger and the edgertronic camera for up to 10 hours continuously.

 But why not go further and go even more portable? Wifi routers are good and all for a building, factory or laboratory but what if I just want to take the camera out for a spin and catch some nature shots?

Tablet Control With Ethernet Adapter:

By connecting the edgertronic to a tablet directly you get the low latency of 1 second refresh of the live image and complete touch control of the interface.  The setup will work either with Android powered tablets like the Galaxy Tab series and or the Apple iPad with an Ethernet adapter that works with it.

We found an Ethernet adapter for our Galaxy Tab S 8.4″ Tablet on eBay for around $12 US.  Here is a link to a search for this particular adapter on eBay! Be advised that many sellers on eBay sell refurbished products that are not new. If the price is too low it probably is a re-manufactured unit even though it is listed as new.

Our Galaxy Tab S 8.4″ has about 10hrs battery life normally at half brightness, with the Ethernet adapter it was reduced to under 6hrs at medium brightness. When out in the sun we needed full brightness which reduced the battery life to 2.5 hrs for a 100% charge.  Once focused and set up if you have access to a wired controller we suggest locking the tablet to save battery.

The configuration to connect to the camera on Android looks as follows, probably close on Apple iPads:

  • IP Address: 10.11.12.1
  • NetMask: 255.0.0.0
  • DNS address: 10.11.12.13
  • Default Router: 10.11.12.13

It was a completely different experience to use the edgertronic while on a portable setup with a Tablet.   The camera, the adapter, the lens, the trigger and battery all fit in a small shoulder bag. With a lite tripod added to the mix you have a portable high speed solution that can go anywhere and film wildlife or other nature subjects.  If you get an edgertronic camera you really need to try a setup that is as portable as this, it becomes very close to what a DSLR is able to do for portability when shooting video. 

We recommend you choose a larger tablet as our 8.4″ Galaxy S did have it’s battery drained too quickly and the interface sometimes required portrait orientation to adjust settings.  A 12″ tablet would make this setup even more impressive while a 10″ will make it very portable still.

Nano USB powered Router and Tablet/Laptop:

The last method for edgertronic portability came courtesy of =&0=&who also=&1=& Marcus decided to try the ZyXEL nano wireless router.=&2=&

The router is so small that you can Velcro it to the side of the edgertronic and by connecting it to USB on board the camera “powered by the edgertronic SC2+ itself” it becomes a full featured wireless access point that can be accessed by laptops, PCs, tablets and even smart phones. We did not try this method first hand but many edgertronic owners use this method for portability. We expect the delay from live preview to be around 1.2-1.4 seconds same as our wireless router test. Very nice!

Here is the setup; Camera is connected to the router by USB for power and a small 1ft Ethernet cable is connected from the edgertronic to the router. Then the Router feeds wireless data to any device with a chrome browser and WiFi. Pretty ingenious setup!

If you want complete freedom from the camera and want to control it wirelessly and with minimal cabling, having the nano router setup is the way to go.

Notes on Portability:

The power of the portability options create a camera setup that is able to be anywhere and everywhere.  Underwater setups would require something more sophisticated as wireless signals are unreliable when it comes to water, they will either not reach anywhere or reflect too much to be a coherent stream.  For setups in every other scenario the portability of the edgertronic is both easy and relatively cheap to achieve.

Be aware that using the camera out in nature will need a very bright screen to be able to read the interface in the sun. Tablets and laptops even at full brightness may become hard to read or judge focus on the interface.  Having a shade screen for a tablet or laptop will help when dealing with sun issues.  Dealing with the California intense sunshine at HSC is great for high shutter speeds and frame rates but it’s torture for judging camera settings, so get a good bright screen that performs well in direct sunlight.

We also can’t stress enough the unsealed aspect of the camera. The vents are not prepared for water splashes of any kind or sand/dust getting in there which includes the mount when changing lenses. Your camera might be wrecked if subjected to inclement weather in seconds.  Plan ahead with an EWA marine or other type of camera weather case if you plant to be in humid or flying particle environments like the beach or industrial scenarios.   The camera can take enough heat to be in a sealed case for a while so that is a plus for harsh climate use.

Interface/Software Feature Checklist:

During our edgertronic SC1 review last year we had suggestions for new features for the camera software and we will review progress on these and new unexpected features here.

Camera Setting Presets (DONE and Implemented): These were implemented already in recent software which ships with the SC2+ and work quite well. We can cross this one off from our list!

I-O Points (Feature Considered in a Future Update): Ability to set In and Out points Before saving footage. This is a feature that is available on other high speed cameras. You could scrub around the memory even with delay and select in and out points for what was recorded. The final selection will become the saved clip.   It will allow for faster saves as only the action selected is encoded and avoid wasted frames saved on the SD card or HD.    BufferSaved Selection

Update 2017: edgertronic’s new firmware as of Mid 2017 includes the ability to Review Before Save feature and works with all of their cameras. Works perfectly and allows for unlimited selection point saving. Excellent addition!


Histogram: (MISSING) While the edgertronic SC2+ has a better dynamic range and hardly misses exposure it does present a problem with highlights when over exposed turning full dark black. Having a histogram is an ideal way to avoid under exposure and over exposure in the footage. The absence of RAW shooting makes this feature needed even more.  While exposure has to be judged on the live screen, it is sometimes extremely hard to know if highlights will be blown out or shadows completely cut.   Judging exposure will become less of a guessing game.   A simple histogram is one of the most needed features for the camera to preserve all luminance values in a frame and dial the correct settings to maintain balance. 

The Histogram should be live and positionable on screen. A color histogram with RGB values for the color edgertronic would be the icing on the cake!

Focus Peaking (MISSING): Focusing on the edgertronic is somewhat easy and if you have a large monitor more so. However when you are outside in the sunshine or under extremely bright light, focusing is very hard.  Having Peaking with color accent on high contrast areas would be ideal to be able to accurately focus on the camera by adjusting the manual lenses.

White Balance (MISSING): Balancing to white or gray should allow for a custom White Balance setting and some presets like tungsten, incandescent, daylight and maybe Kelvin. The edgertronic is already balanced to daylight right off the bat which is great if you are using 5600k light sources or sunshine as your main light sources.  Which should do well for most shots; however, if you are in different artificial lighting conditions the inability to adjust white balance is hard to cope with.  This is only needed for the color version, Monochrome edgertronic is B&W and does not use color balancing from the lack of a Bayer filter.  

Ability to Name Clips or Session (Somewhat There): Clips are auto named by number, having the ability to append a specific name or numbering to clips to identify a session would be a good way to improve workflow organization. This should be relatively easy to do. However the addition of overlays like text and logos lets you identify clips and these are burned in.

However we would like an option to have the names be appended into the file name conventions instead of burned in the overlay image.

Audio Trigger (Implemented with TriggerTrap):  Triggering works via the interface, the wired trigger or the back multi function button.  The audio trigger works by starting an event when a loud sound is heard by a microphone.  It could be a shout from the operator or a breaking object like glass. Anything above a predetermined dB level could be the trigger signal.  

By attaching an iPhone or Android device with the TriggerTrap Software and use a Start by putting the bigger TriggerTrap connector in your mobile phone’s headphone jack. Then plug the smaller TriggerTrap connector into the edgertronic trigger input jack. That is all there is too it!

This frees the operator from triggering the camera if it is close to hazards like an explosion or shattering object.   You can, of course, use pre-trigger % to record all action prior to the sound if needed.

You will need a TriggerTrap MD3-E3 to use with the edgertronic available here at Amazon for $37 USD More info on triggering the edgertronic with audio here in the edgertronic Wiki.

Audio Recording: “This feature could be implemented in a future release See the Wiki Here While slow motion audio gets pretty unusable after 1000 frames/sec as it just becomes a garbled mess, you can get a lot of good audio effects from a good quality 16bit or 24bit 44khz or higher recording format from 60fps to under 1000fps.

Explosions, human voice, crashes, glass shattering, sports all can get that extra awe factor from recording the audio at lower frame rates.  If you playback the clip at what was recorded ie: 700fps you ideally would get regular audio speed while slowing it down would give you slow and altered pitch.    This information should be added to the Exif file with a % indicator of how much slower than realtime the audio is recorded at.  ie: Sound-2333% for 700fps

GoPro Cameras record slow motion audio at up to 240fps and it sounds very cool with the right subject matter! See this example of why it might be a valuable addition.

Note: The edgertronic Wiki talks more in-depth about what an audio implementation on the camera could offer. Click here!

File Browser: (There but some missing features and GUI):  The SD card and camera file system can be accessed by a new tab and typing the following address: 10.11.12.13/static/mnt/sdcard/DCIM/

Note: The IP address of your camera can change depending on the connection used.

The file system HTML viewer lets you download any file from the camera be it a configuration file or a video.  There is no ability to rename and or delete a file if needed. This is better than having nothing but we would love to see a GUI file system accessed from the main user interface like the one below:

Ability to browse the SD card contents and Preview Saved Footage besides the current last recorded.   A simple HTML 5 based file system with the ability to rename, erase and copy clips to and from the SD card to a connected USB device.  Erasing a video should also erase it’s Exif file along with the clip.

NOTE: A way to access files and interface with them  is planned for a future release of the camera software. 

Python Programming Support (New in camera software version 2.2):

The camera SDK here in the WIKI Page has allowed for some clever ways to program it for scientific purposes and or create party slow motion video booths. However the Python support creates avenues for new features like the ones below:

Example uses:

  • Multishot auto save – Automatic save of multi-shot videos if the camera is idle for more than a specified timeout value.
  • Hardware watchdog timer – Enable the DM368 hardware watchdog timer to reboot the camera if the python code stops responding.
  • Auto download videos – After the camera is finished saving the video file, copy the file over the network using ftp or scp.
  • Email alert – Send an email when the storage device starts getting full.

Here is a larger explanation of Python Support from the edgertronic Wiki if you need more information:  http://wiki.edgertronic.com/index.php/Adding_python_code_and_URLs

NOTE: We have to point out that the absence at this time of these features  above does not impact the usability and or performance of the camera today.  It works as a great slow motion camera and it does so reliably with a robust set of features.  The open architecture allows for all sorts of features to be added in the future and if you do not see a feature you desperately need you can probably program it to fit your needs.

A few small nitpicks:

Multi-shot/Playback :The camera cannot play back the last saved clip if you are into Multi-Shot mode. If you modify the shot count back to 1 then you can playback the last saved clip but the playback interface button should remain when recording multi-shot. Easy fix!

SD Card Issue when Full: During our review the 32GB Sandisk Extreme Pro card filled up once and we were unable to dismount the card even after the option was offered with a button.  Our two options were to dismount the SD Card by force which would probably cause data corruption or power off the camera. We decided to power off the device by pulling the plug. No data was lost in the card except the last clip that was saving was unreadable because it got truncated.

Lack of HDMI: Many of the missing features like LUT support, Peaking & Histogram could be remedied by having an HDMI output of the live image from the camera to a monitor like a Small HD here.  However no internal settings could be changed since you need a web browser capable device. Never the less this would allow the camera to be positioned, focused and exposure checked before messing with camera settings.  Furthermore if implemented at 10 or 12 bits, it could allow for recording monitors like the Atomos Ninja to record in RAW for frame rates up to 120fps which is quite low. Not a big deal but would be a nice extra to have in this camera! 

edgertronic SC2+ Conclusion:

The edgertronic SC2+ camera is a full featured high speed option in a segment of the market dominated by hyper expensive equipment orders of magnitude in price. It creates a new market for 4,456fps at “$12,990 USD”.  It gives students, researchers, hobbits and creative video professionals access to their very own professional grade high speed camera which can capture extremely fast events up to 31,191fps resolution dependent and a maximum shutter speed of 1/800,000 sec.

It works with just about any terminal that can run the Google Chrome browser including Laptops, PCs, Macs, Android Tablets, Smart Phones or iPads with an Ethernet interface or wireless with the addition of a router to the mix.  The interface is straight forward and easy to operate with many features that will help catch the hardest of shots.  Pre triggering and Post triggering will allow any capture combination you can think of with an interface that lets you know in advance the maximum shot duration without doing any math.

edgertronic SC2+ Review Sample Video Footage:

Resolution wise it delivers HD 720p at 4,456fps and a slightly higher 1280*864 full sensor resolution at 3,720 fps.  The closest competitor that is available and can shoot an anything close to these speeds costs at least 5x the price of the edgertronic SC2+.

As an evolving platform you get support now for preset favorites that let you recall settings commonly used and a way to browse within the browser the file system and download files to the host computer if needed. You get overlay data and a logo image if needed as well as a very useful frame counter for scientific and industrial uses.

The non electronic Nikon mount allows for a large combination of lenses to be used with manual focus properties and with the use of adapters several other lens brands. While some will want access to a Canon mount, it is a small compromise as it was intended for non electronic operation in the first place. It is after all one of the better mount options out there.  If one mount could be chosen, we would go for the Sony NEX mount that has adapters for dozens of mounts including Nikon, Canon, Minolta, Leica, Pentax and PL.

The edgertronic camera delivers very good resolution that when looked at in a 1080p display; feels sharp and detailed even by up-scaling the video signal. For those of you looking for a 1080p camera that does frame rates above 1000fps in this price range you are out of luck but the per pixel quality is better than many 1080p handycams. The next option will be around $20,000-40k USD in something like a Fastec T5 with just 634fps a far cry from the 4,456fps of the edgertronic SC2+.    Up-scaling slow motion has been done on 1080p TV for over a decade, for example the Planet Earth BBC series winner of several awards used Photron cameras with 1024*1024 pixel resolution at 1000fps cropped to 720p to record the jumping white shark for example; resolution in this case is not a component that affects the strong impact of a shot like this. The edgertronic is capable of such resolution in frame rates up to 3720fps at 1280*864.

As you can see in the Monarch picture above; converting 720p from the edgertronic SC2+ to 1080p with just a simple upscale in Photoshop shows how good the detail on the camera is to begin with. The lack of a low pass filter permits extreme detail to be recorded and permits up-scaling while showing resolved detail way above many 720p cameras.

Artifacts: The Camera does have a few issues when detail gets extreme in shots; like color moire “Not present in the monochrome version”.  High speed cameras and regular cameras with no low pass filters exhibit the same artifacts. The edgertronic does not have a low pass filter which makes moire and aliasing more apparent and at the same time allows for a lot more of detail captured to be retained in the frame.   For the times for when detail will show these artifacts you could always de-focus just a tad or add a softening filter to the lens. This will get rid of most artifacts the few times when they will show up. Also you can try an optical low pass filter like those made by Mosaic Engineering and adapt it to the edgertronic if needed see here!  The video below shows a low pass filter applied to a Nikon camera. It can make wonders to reduce artifacts from the lack of a built in OLPF in your camera.

Codec: The H.246 codec in the edgertronic SC2+ is very good at retaining detail and motion with no visible artifacts, RAW capture is not available at this time but it is not sorely missed due to the great implementation of the variable bit-rate codec.  The case for RAW gets stronger if you need more dynamic range or want to process images with a RAW converter and the flexibility it allows when it comes to color, sharpening, white balance and noise suppression.  However we were impressed by the camera’s near 14 stop Dynamic range and beautiful color rendition that was just 2% off our color chart metrics.  The detail, color and codec are all at professional levels of quality, certainly there is no lack of bits for even demanding users here. The camera is also much better than the edgertronic SC1 or first edgertronic which had less dynamic range and more aliasing artifacts in the image.

Files grade and are edited seamlessly on any modern computer system with beautiful color, tonality and highlight roll-off that are at the limits of what an 8 bit image can provide with nearly 40 megabits/sec when using high quality encode mode at 720p which is extremely high by any standard.

The open architecture of the camera allows for adding features or automated functionality for your applications. Be it a laboratory experiment or an automated photo booth.  You can completely automate the camera capture process and have an autonomous high speed terminal for any use. The new Python language programming additions allow for even more customizability by allowing files to be saved on a remote server or computer for instant backup after the first save. These and other features are ages ahead of other prosumer cameras that shoot slow motion like the Sony FS5 or FS700.

Should you upgrade if you own an edgertronic SC1?

If you need higher than 701 fps at 720p then this is an easy decision. The SC2+ is better in allowing up to 6300% better frame rates and an extra stop of dynamic range with less imaging artifacts. It is easy to replace in your setup as the cameras are identical when it comes to body design and software. Upgrading is as easy as swapping one for the other.  Furthermore you can keep your old SC1 and use it to record at the same time from another angle and frame rate to get a different vantage point. Both cameras can be synced to record in tandem over a sync cable using Genlock or via the network trigger.  If you fount the original edgertronic a great camera then the SC2+ is an even better proposition in everything but the price. However at over 6x the performance at only slightly over 2x the cost, the SC2+ is the better buy for longevity and usefulness. 4456+fps allows you to see a world that 700fps simply cannot even start to unravel.

Who is it for: educators, scientists, industrial production line monitoring, hobbyists, imaging geeks, nature researchers, party photo booths, small and large video production companies, videographers, golfers, sport coaches, universities and even NASA as the cost is so low compared to the performance achieved. We also recommend it as an upgrade option to any edgertronic SC1 owner.

If you ever wanted to have your own high speed camera for troubleshooting hardware, perform scientific experiments and observations, capture nature wildlife and physical phenomena that are invisible to the human eye; due to timescales above what regular cameras can capture the edgertronic SC2+ fills the void and lets you uncover a hidden world of wonders. See the last set of clips made for this review below:

edgertronic HSC camera review footage Part 2:

Who should pass on it: Soccer Moms, people that need a minimum of 1080p resolution , point and shooters. 

The workflow on the edgertronic is simple but it is not for everyone, if you think that you want it to record your kid at soccer or baseball it could be a frustrating experience because of the lack of a built in screen. If you install a wireless nano router and use a tablet it becomes much easier but it is hardly at the level of a camcorder or point and shoot camera.  You need to think your shot, pre focus, frame and prepare for every recording prior to clicking the trigger shutter.  Waiting for the camera to write a clip can also make you miss the next moment if you choose a very high frame rate that takes minutes to record and save. However all of these issues become transparent after using the camera for a few days and becomes second nature with it becoming easier every time. The camera is very easy to use compared to most other professional slow motion options out there and this is no small detail.

Pros:
  • Dependable and solid design with 24/7 operation in mind.
  • Quality 4,456fps is a record for this price range at 720p.
  • Large APS-C sensor with huge pixels is great in low light.
  • Nearly 14 stops of Dynamic Range with lower noise.
  • Costs less than 30% of competing high speed products.
  • Programmable and customizable with SDK and Python support.
  • Multi Camera Triggering Capability – Genlock and Network Sync
  • Ethernet 10/100 and dual Powered USB ports included.
  • Nikon Mount allows for the use of hundreds of available lenses.
  • Complete kit with 50mm lens, cables and Trigger shipped in box
  • Wiki page has a wealth of information on the camera and more.
  • Uses H.264 codec with great quality encoding to SDHC Cards.
  • Controlled by any device that runs Google Chrome browser.
  • Easy to use out of the box with Automatic Sensor Calibration.
  • Multi Shot Support which allows several recordings before save.
  • Small footprint allows for portability and custom enclosures.
  • Small Portable 12v batteries allow it to work for up to 10hrs+.
  • Custom info, frame# and logo can be burned in footage if needed.
  • Can be operated remotely with any network connection.
  • Active software development continuously adds new features and fixes found bugs.
  • Easy upgrade and switch for edgertronic SC1 Camera owners.
Cons:
  • Camera lacks weather sealing, requires external casing for wet and dusty environments. Like an EWA Marine Bag see here.
  • Lack of built in  touch screen, requires a device like a tablet or laptop for extreme portability.
  • Lack of internal WiFi module requires low cost external solution.
  • Color version of the camera has Moire and Aliasing to some degree due to the lack of a low pass filter, much less so than edgertronic SC1 Color. Can be corrected with third party low pass filter-see review above.
  • Black sun problem can affect a small number of over exposed highlights in shots. “Could be corrected on future update” This is also present on many competing products as evidenced in the Rio 2016 Olympics see below:
  • Purchasing and shipping requires a US address.
  • Resolution lower than 1080p can limit it’s usefulness due to minimum requirements to video and film professionals.

Verdict:

The edgertronic SC1 has been dominating our HSC Camera guide since this site went live. And continues to be on top in the overall ranking because of price/performance. However the edgertronic SC2+ in second place is a much better camera in every respect but with a higher price tag. It has a better sensor, better dynamic range, 6300% more frame rate at 720p and better color rendition.

There is nothing shipping today that gets close to the features of this camera at 4,456fps and in this price range; if you want high quality HD slow motion video that won’t break the bank above 240fps, 700fps, 1000fps, 2000fps, 3000fps and up to 4456fps the edgertronic SC2+ is the only camera to get at this time.

The camera is rock solid with no crashes or reboots at all during our 4 week testing. The camera is designed for 24/7 operation and it shows.

It’s open architecture and programmability makes it adaptable and extensible going forward. Continued software development improves the camera with every release and they do listen considering features we asked for in our SC1 review are already implemented in the current release for all edgertronic cameras.

We give the edgertronic SC2+ camera our highest praise with the “Platinum Award” for making available for the first time to anyone with a mid range camera budget a high quality HD super slow motion video camera that breaks the 1000fps barrier at 720p and goes above and beyond by doing it over 4 times at 4,456fps.  The camera was a joy to use and the footage that you can record will leave you speechless.  The SC2+ is a much better and useful camera than the SC1 ever was and was built on a mature software platform.

Thanks to Mike Matter of Sanstreak for providing HSC the edgertronic SC2+ color camera for this review & to the Sanstreak staff for support.

For more information about the edgertronic SC2+ camera including ordering information please visit  http://edgertronic.com/

Comment about this review in our forums!

Thanks for your support of HSC, if you decide to acquire an edgertronic or any other camera please mention this website. We do not get a commission or remuneration but it helps us measure the reach of our blog. 

Written and reviewed by James Benet © 2016

One last thing…

Water Balloon Explosions with the edgertronic SC2+:

edgertronic SC2+ Review – Part 2

edgertroinic SC2 Review part 2

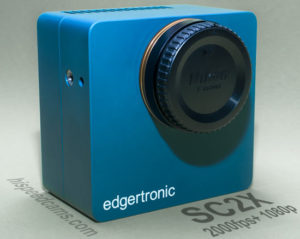
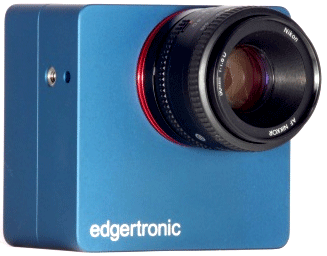
In Part 1 of this review we looked at the body and design of the edgertronic SC2+ camera. Touched on the mount and available frame rates including a few new changes and some video samples. Part two is all about using and understanding the abilities and limitations of the camera as a high speed tool for science, film and or curiosity.

With the advent of 4,456fps the edgertronic SC2+ is no slouch when it comes to sample events too quick for the eye to see. In fact for many uses it is just too slow; as in the case for people shots, many sports and a majority of nature shooting. However with the camera being this powerful you still can dial it back to 2000fps or 1000fps if needed easily while capturing those events perfectly.

Connecting and firing up the camera for the first time:

Once placed on a  tripod or other stand using one of the two 1/4″ bolt screw mounts it is time to wire the camera up.  The sequence in which you attach the cabling can be out of this order but we found it easier to do it in the following steps:

1) Insert a compatible SDHC card on the SD slot of the camera. The kit comes with an 8GB card but we tried a Sandisk 32GB Extreme 30MB/sec video rated card and had no issues (Make sure it is SDHC and not SDXC).  The cards have to be formatted in the FAT32 filesystem common to Windows machines of the last decade.  FAT32 works on smaller sized storage fine and up to 32GB it should have absolutely no performance difference compared to other more capable file systems like NTFS. SDXC Cards will not work with the edgertronic so keep this in mind!

2) Connection of the 10/100 Ethernet cable shown in blue.  Connect the other end to your PC, Laptop or wireless/wired router for easy connectivity to portable devices like smartphones or tablets.

3) Connect the wired trigger remote in it’s port. Connect the extender if you need extra reach (advisable)!

4) Connect the AC Adapter or 12v Adapter with a compatible Battery like the Bescor or Anton Bauer ie the new Vagabond Mini from Paul C Buff “$239” is capable of running the camera for over 8hrs straight.

Once you connect the power cable the camera turns on automatically and starts the boot up process “There is no Power Switch”. Booting up takes about 15-20 seconds including calibration it is really a non issue since you still have to open the control interface in the PC, Mac or Laptop.  The camera runs on Linux and you never have to fiddle with the system unless you want to test your own software code with the camera using the SDK here.

Setting up Networking:

The camera needs to be accessed through a 10/100 networked device that runs a web browser. edgertronic works best with the Google Chrome browser and while it worked fine on explorer and Apple’s Safari you really want reliability and stability when using the camera. Just use Chrome and save some headaches. We used Version 51.0.2704.103 m of Google Chrome during our review and it was rock solid.

The easiest way in our view to access the camera without much configuration in a studio is to use a router either wireless or wired with the camera.  Plug in the Ethernet cable on a router that is also feeding a signal to your computer and just find the device by typing the IP address on the browser bar.

The router we connected to had the following IP address  192.168.0.1 and the camera had an address in that range in this case it was just a matter of changing the end number .1 to .2,.3,.4,.5.6 etc to find the camera.   Our router assigned the number http://192.168.0.6/ to the edgertronic and worked every time on that address for the length of the review testing on the local network. Once you punch the address you are greeted with the edgertronic interface.

Network setup by direct cabling to computer: If you need to access the camera from your computer directly it needs to be configured first in order to talk with the edgertronic.  The Ethernet cable needs to be connected from the edgertronic to your computer network port.

Your computer network settings should look like this:

  • IP address 10.11.12.1
  • Sub Net Mask 255.255.255.0
  • Default Gateway: 10.11.12.13

Once you setup your computer this way you will loose your current networking except for being able to access the camera.  If you have a laptop or desktop with an Ethernet cable and WiFi interfaces you can access the camera while retaining internet/local network connectivity without issue if you connect to your network through WiFi.

To connect to the camera in this mode you just need to type the following URL in the Chrome browser: http://10.11.12.13

The Camera’s IP is always  =&1=& unless you decide to change it by entering the firmware change through a Telnet command line. We saw no sense in changing this easy to remember IP number.

Portable Configuration:

Marcus Ranum recommends using a wireless router in this case a ZyXel Travel Router.  His configuration can be found here!

We have saved Marcus’s configuration in a PDF here if you need it for offline use. PDF Wireless router Configuration ZyXel.

If you want portability we urge you to get a wireless router like the ZyXel here for about $20. We used it a lot and it worked like a champ. The edgertronic begs to be portable and with this router you can use any Apple or Android tablet with the Chrome browser and take the edgertronic anywhere with little trouble. As long as you have a good portable battery the router can be connected to the USB ports on the camera and be powered from there.

Camera Interface:

Once you connect to the camera you are greeted by a first connect greeting and agreement, once you say ok you are then presented with the basic main interface parameters.

The interface is programmed using HTML 5 and Bootstrap and is very responsive and modern. Floating windows and panels are movable around the screen to fit workflow.

Settings are divided in two columns, one for Input which is the Requested column and the Actual which is the value that will be applied.  Actual lets you see in advance how the hardware will behave with a certain set of parameters before applying the changes and start calibration. This saves time and guesswork and lets you learn the features of the camera and its limitations.

Settings available on the standard interface as follows:

-Sensitivity: Lets you input ISO sensitivity in fractional increments. You have the freedom to choose the ISO increment according to your available light to within a few units and not to hard locked Parameters. This is a great feature to have to use the best quality compared available light! For example ISO 120 can be used to add just enough sensitivity without altering the quality of the image perceptively. This will add 1/5th more light to your shot for free.

The ISO on the color edgertronic SC2+ goes from 100 to 1600 and the monochrome camera from 400 to 6400 ISO.

-Shutter: Lets you choose a specified shutter speed. The scale goes from 1/30th of a second to 1/800,000th of a second. This box also lets you set shutter speed by the single digit, in this case a frame by frame increment.   If you need a specific number to avoid some flickering in your light source you can do so by finding that parameter by increasing or decreasing the value with 1 unit precision.

-Frame Rate: Lets you choose a specified frame rate you need for the shot. The scale goes from 30fps all the way up to 31,191fps- resolution dependent.  It can be adjusted by single digits and while not all values result in an actual precise value, the frame rate is within 1fps from the requested input value.  It is still an extremely flexible frame rate that very few cameras allow.  (Note: Sometimes you will have to increase the shutter speed at least 1/100 more than the desired frame rate to get such speed. Has to do with some sensor parameters)

-Vertical:  Lets you select the vertical resolution of the frame. From a low of 96px to a high of 864px. Single digit input but auto adjustment to the closest sensor supported resolution.

-Horizontal:  Lets you select the horizontal resolution of the frame. From a low of 192px to a high of 1280px. Single digit input but auto adjustment to the closest sensor supported resolution.

-Duration: Lets you specify the shot recording duration in seconds up with up to hundreds of a second or two decimal places. i.e. 1.22, 2.38 3.88, 4.87 etc…  The maximum duration is dependent on resolution and frame rate, for example recording at the lowest settings of 1280x96px  which is the lowest the camera can go resolution wise without cropping the horizontal will yield a memory buffer recording of 4,660 Seconds at 30fps and 3 seconds at 31,191fps the highest the camera sensor can go. That is a whole lot of recording at 30fps which is not really that useful unless you are recording a live event of 74 minutes non stop. At the other end of the spectrum at full HD resolution which is 1280px * 720px and at 4,456fps using the 16GB memory buffer on this SC2+ model delivers 4.183 seconds which is actually a pretty long time in slow motion action.  That would be 18,640 frames recorded or 621 seconds played back at 30p or 10.35 minutes

The following chart shows common resolution and frame rate combinations you might use:

Resolution edgertronic SC2+ Frame Rate
1280*864- Full Sensor 3,720 fps
1280*720 HD 4,456 fps
1024*768 4,180 fps
768*688 4,688 fps
768*592 5,406 fps
720*480 NTSC N/A
640*480 VGA or 1280*480 6,647 fps
640*352 Half HD 9,010 fps
512*288 10,959 fps
320*240 Half VGA N/A
256*160 19,308 fps
256*128 23,852 fps
1280*96 Lowest Res 31,191 fps


-Pre-Trigger: Most high end high speed cameras have what is called a Pre and or Post trigger function to be able to predict and catch the action during the limited time frame the camera records.  

The bar above shows a pre-trigger of 50% default which is highlighted in green.   The 8GB in the camera memory is segmented in two at 50%, 4GB in green and 4GB in gray.  For a 10 second record time for example it means you get 5 seconds recording before you push the trigger and five seconds after.

You can alter the pre trigger number in single digit increments from 0% which means you wont have recording unless you press the trigger in which case will give you the full buffer after and or at 100% which means the camera records up until the point the trigger is pressed.

Depending on your shot you will need to alter the pre-trigger value in order to capture the action.  If you are a single shooter that will also be performing the action “i.e. popping a water balloon” it makes sense to allow a pre-trigger of 100% to capture the pop until by pressing the trigger you stop recording. The balloon has already exploded, water comes out and no action remains.  If you are waiting for a lighting to strike you will also need a large pre-trigger value or the like so you capture the lightning in the pre-trigger buffer and stop after it passes when you press the physical trigger.

Shorter pre-trigger values are needed for catching wild life like birds and dogs as a 30% for example gives you time to react press the trigger and record the secondary motion after the initial subject movement. If you want to run yourself or jump framed in the shot you will need no pre-trigger and put it at 0%, then after clicking the trigger you will perform your action and it will record for the specified duration in seconds.

The flexibility of this system cannot be understated as it reduces the chances of false captures or failed keepers and the buffer is long enough to allow for some or a lot of wiggle room depending on your agility and preference.

-Shot Count: This setting is quite a wonderful addition to the camera. It was planned to be supported in hardware from the start and it works by splitting the buffer into the shots specified according to the time allowed.  For example if you have 9 seconds of buffer at your specified resolution and frame rate at 1 shot, then you could ask for 3 shots in this parameter and get shots that last 3 seconds each all with their respective Pre-trigger percent number %  as selected in the pre-trigger box.

If you record in shot count mode you get the interface above which lets you know how many shots remain and lets you record them to the SD card before all of them have been shot in case you don’t need another take.    If you are doing a lot of repetitive actions that require patience and endurance then multi-shot Shot Count is for you.   If you wanted to record lightning during a  storm you could record quite a few before the card writing process begins which will give you more chances to get a great sample.

At 4,456fps 720p HD we were able to get 4 shots of 1 second each which considering how slow a time frame it is you will spend several minutes waiting for the camera to record the actions.

Recording the first shot:

Calibration:  After settings have been entered and the settings window is closed on the X close mark or the mouse clicks outside the settings window area; the camera will do a quick calibration step which sets the sensor mode to the parameters requested by the user and does a series of dark frames by closing the physical camera shutter “making an electronic audible noise” for an instant and taking some exposures. The image will momentarily change to a series of vertical noise pattern lines which is the sensor’s noise pattern. The camera uses this frames to cancel out the signal noise and produce the best image quality for that mode.

The edgertronic SC2+ does this automatically which is a big plus as some other more expensive high speed camera solutions require manual calibration after each settings change which is a time consuming process.  This is an impressive feature that works perfectly and makes the camera extremely friendly and dependable at the same time.

Recording:

The camera is ready and the blue and green LEDs on the back are steady which means settings have been entered, calibration happened and it is awaiting a trigger event from the controller, software or the back plate multi function button.

The above shot shows our settings on the right, 200 ISO,  1/5000 shutter, 720p resolution, 4.183 seconds duration and 4456fps.

The camera icon is the interface trigger button and if pressed it will start a recording event.  You can also do this by pressing the manual trigger controller or the Multi-function button on the back of the camera.  Once pressed the buffer will begin to fill and record the shot.

Files and Saving the recording:

The saving process shows the post trigger buffer filled in Magenta color and the actual SD card or Hard drive saving process on blue.  For every second that passes in the blue saving bar, the camera has saved give or take 40 frames or a little over a second.  However depending on frame content the encoder could take more or less time to save depending on complexity of the image.  For extremely detailed shots saved in the high quality mode which is default the 720p capture could go as low at 27fps encoding. The process is quick considering the camera is encoding to H.264 at huge bit rates for 720p video, orders of magnitude higher bit-rates than common portable camcorders.  In our testing it was common for a 1 second recording at 720p HD, 4,456fps to meet or exceed 300MB in space. So a buffer of 4 seconds would record 1.2GB of data to the card which is a time consuming process.  Your pre and post trigger events will help you reduce your card usage and get action more precisely in the time allotted.  With practice it will become second nature.

The video encoder: The H.264 encoder in the edgertronic is a variable bit rate encoder. It allows for low bit-rates when the frame contains few elements and or very high bit rates when the frame has huge detail.  The encoder is so good that it delivers a very gradable image with great highlight roll-off and very few artifacts. You would be hard pressed to find any compression artifacts in edgertronic footage.  Even after heavy grading and curves adjustment the codec held it’s own.  Motion is beautifully smooth and small details like dust particles are completely retained.  Click on the image below for a full frame sample at 720p.

In the above sample the encoder delivered 39.7Mbps for the 720p image. This is a huge amount of bit rate for HD resolution. Most consumer and some professional Full HD 1080p cameras record at a rate of 15-24Mbits/sec.  You are getting a quality image here no doubt about it.  The encoder can predict in advance any significant changes in the image as the data has already been captured. On the fly camcorder encoders have very little buffer to look ahead which means a harsher motion implementation that can cause tearing artifacts. The edgertronic is cheating in a good way as it delivers the utmost image quality from it’s H.264 encoder by looking ahead and back at the data and choosing the appropriate amount of bits that wont sacrifice image quality.

Video Encoding Quality Options: The edgertronic SC2+ allows for High, Medium and Low predetermined settings plus a Custom Mode. 

Medium offers around 20% file size savings compared to High and similarly Low saves around 30%.

Custom, is for those who want to control the camera’s video processing pipeline. The pipeline is described in a text file which can be provided by the user in the form of a configuration file.

The video processing pipeline file used by the camera can be retrieved from the web address here:

The case for RAW: Most professional high speed cameras deliver their data as RAW image data sequences or TIF image sequences. Which give 10, 12 or even 14 bit color data in the process.  The edgertronic captures in H.264 at 8 bit which is perfectly usable but lacks that extra bit depth.   If you needed perfect gradation with no banding even in extreme circumstances you would need RAW but while testing the camera we found no instance where we thought we needed that extra information.

720p HD just lacks the resolution footprint to make these artifacts visible in regular use. Furthermore the color accuracy of the camera is exemplary with less than 2% deviation from our chart when using 5,600K daylight LED lamps and the Sun.  The highlight retention and dynamic range of the camera which we think is close to 11-13 stops has been proven more than adequate for our tests.   If highlight retention is your goal then dialing a faster shutter speed would alleviate any over exposure on the image.   

The shadow areas are very clean at ISO 100 and lifting them produces very few artifacts. The files are very gradable and applying color 3D LUTs works fine if needed.   We wish there was a way to scrap the edgertronic’s default S curve and get a flat profile out of the camera. This would allow for easier grading to mix it with other cameras.  TV and film are not the edgertronic SC2+’s primary market so this is probably not going to happen unless there is a big demand for it.

Raw sequences would take a long time to record to an SD card and would fill the cards very quickly.  H.264 is a great compromise between quality, speed and workflow and makes handling editor ready files very easy.   If in the future the edgertronic allowed for RAW capture on DNG sequences or similar formats we have little doubt the vast majority of users would still default to H.264 for High Quality Setting encoded footage.  It works, it is of very good quality and your storage will thank you!

File Wrapper: The video files are saved as H.264 codec video streams in a Quicktime .mov wrapper. This is ideal and compatible with both Mac and PC computers and Linux work stations with compatible players. If needed changing the file extension from .mov to .mp4 lets the files play on any player that can playback MP4 files. In short you won’t find any video compatibility issues with this camera video file format.

File size and cutting length of files: The file size of the videos captured is based on the bit rate size, image frame size and the duration.   Some of our clips passed the 1.3GB mark but most were under 300MB as we truncated the duration either with time or while saving a clip with the interface Truncate Button.  

While saving a video you can stop the recording at any time which will cut or truncate the video from that point forward. If the action in your footage has already happened you can cut the tail end of the footage and save time and space. Our 32GB card was able to record about 110 720p resolution 1 second 4,456fps  videos before filling up. That is quite good mileage for a high speed camera of this caliber.  If it was RAW the entire card would fill before reaching 15 clips. You will get tired way before the camera has filled up from an entire day of shooting. Our longest stretch was 9 hours of shooting and we filled 27GB of the 32GB card.

Exif Information: The edgertronic camera records a complete exposure and recording information file Exif along with every video recorded as a separate .TXT text file an example of one below…

As you can see, a lot of information is recorded which lets scientific, industrial and creative users extract useful information about the settings and conditions of the camera when a recording occurred and replicate a shot settings precisely if needed. This is a very easy and useful way to gather camera data.  This easily beats digging in the video file information for the data. This is a big workflow plus for the edgertronic.

Playback and other standard features:

Once a video has been saved it can be played back directly from the SD card or hard drive that is connected in the USB slot. Only the last saved video can be accessed; if you need to see a previous video you need to examine the SD card or hard drive itself after un-mounting.  Below is a screen shot of the video preview window after recording.  You can start/Stop and expand full screen. This is a full resolution sample and identical to the one recorded on the card.

The Camera can also download to the host computer the last saved video .mov file from the SD card to the computer’s local storage.  If you want piece of mind about a great shot and want to keep it as a backup it is a good option to have.

If you need to remove the SD card or USB Hard drive or Stock device for any reason you have an un-mounting button available that lets you do it.  If you pulled either the SD card or hard drive while the camera is on, without using this eject button you risk of damaging the file system in the card. Be sure to keep this in mind!

There is a Help button accessible from the main interface which opens a new tab in the browser and gives you a complete user guide and other troubleshooting information for the camera. This is independent of internet access as the information is located inside the Micro SD card inside the camera body.  You can never loose the manual because it is readily available. Good Thinking!

The wrench button is just the way back to the original settings dialogue box.

You will be using this button plenty. Going in and out of this mode will trigger a camera calibration event if frame rate, ISO, shutter speed settings change.


In Multi-shot recording mode you loose the ability to play back your last shot or download the last clip. Which when a sequence is fully recorded should be available. You get new icons of record and stop recording which let you record all the multi-shot recording buffers or cancel the remaining buffers at any time.

Auto Fill Intelligence: The entire interface value panel adjusts to the entered numbers or by the lack of them. The interface and software for that matter are intelligent enough to show in the “Actual” column the outcome of filling or leaving fields empty.  This is an extremely easy way to get to know the camera features and limitations.   It is as if a genius of high speed values was guiding you through the whole process and won’t let you make a mistake.

Lets say that your main interest for this shot is frame rate,  If you Input 10,000 fps in the “Blue Marked field you will not get a solution immediately because the camera defaults to 1/500th of a second shutter speed; this is too low for 10k fps you need at least the same number of frames as shutter speed in order to capture that many.  The edgertronic will always like a bit more shutter speed than the frame rate requested so we gave the shutter speed a value of 11,000 shown in “Yellow”.  

Now if you look at the Actual column you are given the effective resolution for 10000fps which is 208*160 pixels along with the duration and a base ISO of 100 which is default.  If you continue to modify values like upping the ISO or the resolution all the values will adjust accordingly.

The benefit of this entire intelligent Actual system is that without looking at a manual or spec sheet you can experiment with any resolution, shutter speed, ISO, duration and frame rate combination to get a shot.  This is especially useful to get a resolution like 720p to stay fixed regardless of other settings. In that case you will fill the Horizontal value with: 1280 pixels and the Vertical with: 720 pixels.  If you had a great idea for a shot rest assured, by using this system you will arrive at your desired settings very quickly.

Using the camera becomes second nature after a few days of use. You will estimate and learn how to apply the settings for any shot you might need by playing the values in your head and then trying them out.  There is no harsh learning curve. Not only is the camera low cost and powerful it is also very user friendly and logical.

edgertronic SC2+ Review Sample Video Footage:

Settings – Beyond Standard Camera Features!

Clicking the Settings Tab in the main interface, gains access to them.

The edgertronic SC2+ settings let you go at it with several very useful features to get the most out of the camera and use it in a professional setting with more controls.

-Genlock:  To quote Wikipedia “Genlock (generator locking) is a common technique where the video output of one source, or a specific reference signal from a signal generator, is used to synchronize other television picture sources together. The aim in video applications is to ensure the coincidence of signals in time at a combining or switching point. When video instruments are synchronized in this way, they are said to be generator locked, or genlocked.

Basically what that means is that a device or camera will sync or be synchronized by other deices or cameras.  If you need to start recording on multiple cameras at the same time; like that needed for 3D recording applications Genlock is your friend.

Master- If clicked the camera will feed the signal to other devices. You will need to only record on this camera and the others will start recording at the same time.

Slave- If clicked will make the camera expect a signal from another camera to start recording and be timed synced.  You will need to record from a device or another edgertronic on Master mode to start recording.

External-This mode lets an external timing source to control the cameras, could be made by a computer or custom Genlock timer.

Limitations on Genlock from the Wiki:

There are limitations:

  • All cameras have to be configured for compatible timing (see below). For one-to-one frame lock, each slave has to be set to a frame rate that is greater than or equal to the master’s frame rate.
  • The user is responsible to make sure all cameras can be triggered before issuing a trigger. There is no automated check that verifies whether or not a slave camera has completed saving the previously captured video, finished the calibrate operation, has available storage, etc.

When using genlock the cameras can have different duration, iso, percentage pre-trigger, and shutter speed settings.

The overclocking setting found on the edgertronic  SC1 is no longer available as it is a setting for the older camera only. The SC1 used overclocking to get higher frame rates above 701fps at 720p. The SC2+ with it’s 4,459 is not hindered by the lack of overclocking.

As to the future who knows if the camera will be forced to operate safely at those levels. We found the camera speed sufficiently fast already for most uses. However some scientists can never have enough frame rates when capturing physical phenomena like fractures, electricity and magnetism and light propagation. Even the 31,191fps maximum on the SC2+ can be limiting. Some cameras in labs can capture 1,000,000,000 fps or 1 Billion/sec.   Those frame rates are seldom needed outside of controlled experiments.

-Force Monochrome: Allows the color version of the edgertronic SC2+ camera to record in Black and White only. This generates a slightly sharper image and compression data savings but will not equal the per pixel quality of a Monochrome sensor on an edgertronic. The Bayer filter on the sensor pixels will cause a resolution loss on any camera and the edgertronic SC2+ is not immune to this. If you need the utmost sharpness and low light ability then a Monochrome edgertronic is the way to go. In fact many labs and enterprise buy Monochrome cameras much more than color versions as they need it to analyze motion and not look at the colors.

-Video Encoding: Lets you select Low, Medium or High quality plus custom which allows you to tweak the settings in the configuration text file if you need other parameters outside the basics.

-Status Timeout:  Allows you to set a second limit for the interface overlay icons to fade away including all information and buttons. Goes from 1 sec to 100 seconds If you set it to 0 they will never go away!

Overlay Options:

Overlay allows the edgertronic camera to display custom information and data on the screen and burn it in the recorded footage as well.  This is ideal for all sorts of tests and scientific experiments as you can record the actual frame number associated with the time slider and add features like Notes “we used it to title shots” and a custom logo which you can edit. The camera pulls the logo from a file on the internal micro SD card on the camera. You can create custom logos and have the camera overlay them as needed.

This is perfect for identification purposes and file logging. Overlay was a sorely needed feature for many and the current release of the edgertronic software has it available on all three models of the camera; the SC1, SC2 and SC2+ all have the same software support.

Favorites:

In our edgertronic SC1 Review we had some features that felt were missing from the camera interface. Many things have changed since then and now the camera saves Presets or Favorites of the settings so you can recall them easily.

You can save up to 6 settings which will recall the entirety of the camera options with a single click. You get a dialogue box to confirm selection and or overwrite.   Presets are something camera owners love and the edgertronic having them available easily is a tremendous time saver.  For example 720p 4,456fps is our most requested setting and saving it in position 1 makes sense.

With the Favorites you can save odd resolutions and ISO setting depending on the shot you need without guess work and time wasted. In the field the recall of presets can mean getting the shot or missing it.  Glad to see this implemented so well!

ISO Performance:

The edgertronic has large pixels 13.x micro-meters which is huge compared to common DSLRs which have 3.5 to 4 micro-meters pixel diodes.  However the global shutter circuitry introduces noise and reduces the performance significantly compared to those rolling shutter prone DSLRs. See part 1 of this review for more on why the Global shutter is essential in a high speed camera. Still however the edgertronic SC2+ is extremely clean at Low ISOs and holds well up until ISO 800.   Given enough light the edgertronic works well up to ISO 1000. Above that banding starts to appear and the signal degrades. It is still usable for scientific purposes but not ideal for TV or film production even with Noise Reduction post processing.

Staying at ISOs 100-400 for image quality reasons yields excellent results. With some Noise Reduction using Neat video ISO 800-1250 is very usable. ISO 1600 has horizontal banding that cannot be removed easily.   We were hard pressed to go above ISO 250 in our entire review. High speed cameras need lots of light and if you give them that; high ISO settings are not used much as they will not be needed.

Banding starts to appear about ISO 1100 so ISO 1000 should be ok for highest quality in lower light levels.   We took these tests in full LED 1000w equivalent lamps at 30fps. Only shutter-speed was altered to compensate for the ISO variance.

edgertronic SC2+ ISO Noise Test & Low Pass Filter Video!

Using Noise Reduction Software with edgertronic SC2+:

Neat Video is your friend: Looking at how the noise is compressed by the H.264 codec it’s apparent not much is being thrown out compared to a RAW or high quality JPG image. Neatvideo is an application for video editors and compositing applications like After Effects; that analyses video footage frames and averages the noise out with some very clever algorithms for retaining image detail. We created some profiles at ISO 200, 400, 800 and 1600 and compared the results:

As you can see ISO 200-400 is extremely clean after applying the treatment, ISO 800 is great looking and usable too. ISO 1600 however retains some banding. The Noise at most ISOs on the edgertronic SC2+ especially below ISO 1100 is treatable with very good results as the noise is organic and not digital or filled with pesky macro-blocks.  You can safely shoot at ISO 600-800 and pass Neat Video on top after the fact to get a beautiful almost noise free image. See the video below for the full test with Noise Reduction.

edgertronic SC2+ Neat Video Profiles Test Video:

We created the profiles from ISO100 to ISO 1600 out of 50% Grey frames for the edgertronic and for use in Neat Video.

Download Profiles for Neat Video:


Download Free Neat Video Profiles for the edgertronic SC2+ Here<<<


When to use it?

Give the edgertronic the light it needs and it will deliver beautiful silky smooth video without much noise below ISO 800. If you don’t have enough light as it’s often the case just make sure to plan for post processing later.

Sub-sampling:

Sub-sampling is “NOT” included in the edgertronic SC2+. It was a feature that was included on the SC1. It has to do with how the sensor operates and the vertical and horizontal constraints on the new sensor make it impossible.

Why would you want that in the edgertronic? It gives you the option to retain framing in lower resolutions which makes it much easier to place the camera to capture an event. Instead of moving your camera setup back when resolution drops  you stay put. Like the bunny example above you will not retain perfect framing but a good approximation; after all you are throwing away lines of pixels you will not have the same sized image.

Tools Menu:

-Sync Time: Will modify the camera’s time to your computer browser’s time. This is useful if you are shooting in a different time zone and want to keep track of the time there in your shots this is a handy way.

-About This Camera: This button will tell you hardware information among other parameters like time, date, software version, hardware information like color or monochrome and memory configuration. The most useful ones for the average user would be the MAC Address , time/date and the temperature of the sensor and FPGA processing circuitry.

Some more important points:

The edgertronic software is an on going project and new features and fixes are added all the time. Features like overlay, Favorites and multi-shot “Shotcount” were not available at first but now are, this is a great thing for people that want their camera to grow in functionality over time.

The http://wiki.edgertronic.com/ edgertronic wiki page is also a great resource for users of the camera to get the latest on development, footage samples and more on the camera and i’ts community of users.

There is an SDK for software developers that want to customize the edgertronic for custom installations.  You can get more information about it here. This makes the platform ideal for a variety of applications.

Moire and Aliasing: During the review of the camera, some shots exhibited color moire and some aliasing in very detailed textures and diagonal lines. This is not a problem for the majority of shots but does pose a problem for fine detail like hair, sand, small water spray drops in quantity, stacked book pages and the like.  The effect will be visible on the monitor at capture time so you can tell if it will show up beforehand.   The edgertronic SC2+ is improved in both aliasing and moire compared to the SC1, we found the aliasing to be more visible and the Moire barely apparent. It is an excellent sensor with very good characteristics and it shows as a very improved image.

Wrapping up Part 2:

Using the edgertronic camera over a few weeks and being able to see where it succeeds and where there is room for improvement has helped a lot in understanding and judging the product.

Shooting with the camera is a rewarding and easy experience after a few hours of use. You will be getting better at catching action and setting up shots in a few days and will be a certified expert in a month or two.

The camera is very user friendly and has a lot of features to help you in getting the shot quickly.  understanding how to best tailor the hardware to your needs will take a few sessions.  The ongoing development of features is a plus and gives the camera room to grow and expand what it can do.

Over time you will start to think of even larger slow motion shoot projects than what seemed possible at first and the limit will be your imagination.  You will easily run out of ideas before the camera has run out of frames.

The edgertronic SC2+ is a very much refined and improved camera compared to the SC1.  You get 6.x the frame rate in what is essentially the same platform in shape and size. You can just replace the camera by swapping it on your lab or studio and you are up and running. The cameras share the same user interface and the learning curve is the same. If you are an edgertronic SC1 owner, the SC2+ is a clear upgrade with a lot to win in image quality, frame rates and noise profile.

Over part 3 of this review we will be looking at portability out on the field, rigging and recommendations for the future of the edgertronic as-well as the final verdict of this review. Coming Soon!

Thank you for reading and your support of HSC, it allows us to keep bringing you the latest info, rumors, videos and reviews in the world of affordable high speed imaging.

edgertronic SC2+ Review – Part 1

Last year we reviewed the edgertronic affordable high speed camera “Now named edgertronic SC1” . The first edgertronic was revolutionary in price and features and was a big disruptor in the slow motion camera space as many competitors that offered essentially the same performance, were left with price tags several orders of magnitude higher which many customers balked at .

This year Sanstreak the company founded by Mike Matter the mind behind the edgertronic SC1 is now launching the edgertronic SC2 and edgertronic SC2+ cameras which offer performance above and beyond what the original edgertronic camera was capable of.  Software wise it is nearly identical with the evolving code base that has matured in the last two years is used with nearly 100% support in the SC2 and SC2+ cameras. → Continue Reading Full Post ←

Edgertronic SC2 Launches with Amazing 4456fps 720p!

edgertronic SC2

The edgertronic high speed camera by Sanstreak  has been a darling of scientists, industrial, education and content production users since 2013.  The Kickstarter project not only delivered on the promise but became a full fledged high speed camera provider afterwards with more than 540 cameras shipped to date.

Today they cement that legacy with the introduction of the edgertronic SC2 in both Monochromatic and Color versions with a full resolution frame rate at HD 1280*720px of 4,450fps depending on the model selected.The power and capability of the edgertronic SC2 is over 630% higher than the edgertronic 1 camera “max 701fps HD”, which as of today is known as the edgertronic SC1,  will still be available for the foreseeable future at their store as a lower end option.

Meet the edgertronic SC2 & SC2+:

The edgertronic SC2 will be available in two distinct models based on the memory capacity and or monochrome / color capability.

edgertronic SC2 mono only 3700fps 720p HD  $9,990  (8GB) Memory

edgertronic SC2+ color or mono, 4450fps 720p $12,990 (16GB) Memory

As you can see from the body of the camera, the chassis and camera features are nearly identical to the original edgertronic SC1 including:

  • Global Shutter technology allows crisp exposures without rolling shutter jello effect
  • Stores captured videos in H.264 format on a removable SD card
  • Web-browser based control panel
  • Video overlay support for frame number, text, and graphic logo
  • Field upgradeable software/firmware/Os: 10/100 Ethernet, 2 USB ports, external trigger,
  • multi-camera genlock
  • 12 VDC Power, 2.5/5.5mm locking connector 1.5A SC1, 2.5A SC2/SC2+
  • Type III Hard Anodize Aluminum enclosure
  • Trigger button and 4 status LEDs
  • Accepts Nikon F-mount lenses (manual and D series)
  • Built in fan for active cooling
  • Size: 111x108x79 mm exclusive of lens, Weight: ~862 gr without lens

Hardware Changes:

The main changes in the new edgertronic SC2 come internally with a different and improved CMOS Global Shutter sensor “Better Dynamic Range, Higher Array of AtoD Converters, sensor board and extra memory at 16GB in case of the edgertronic SC2+.

 Cosmetically not a lot has changed including the characteristic teal anodized blue aluminum; however there is a red ring in the front of the camera that is there to provide adequate flange distance to allow for infinity focus on the new sensor. The new sensor module changed the plane of focus by a small margin. The ring is there to correct and provide full non powered mount compatibility of Nikon lenses like on the original edgertronic camera.

INCLUDED ACCESSORIES:

  • Ethernet Cable
  • AC Power Adapter
  • Nikon 50mm F1.8 D Lens
  • Airline Grade Fitted Case
  • 12V Car Adapter
  • Wired Remote Trigger
edgertronic SC2+ Video Samples:

The video samples below were shot with an  edgertronic SC2+ 4451fps 720p camera with 1/10,000 exposure time.
 edgertronic SC2+ Lightbulb Crushed Sample video at 4,456fps:

 edgertronic SC2+ Martini’s Shot at 4,456fps:

 edgertronic SC2+ Tubular Lightbulb Hammered at 4,456fps:

Note: The videos above exhibit a phenomenon in the highlights called the black sun effect which is common in CMOS sensors by over saturating the signal in certain AD sectors. edgertronic will be releasing a software update to get rid of this imaging artifact in the near future.  This camera bug has appeared in Canon, Sony and Panasonic cameras in the fact and it is correctable by software.

Camera Model Comparison Chart:

What a difference does 4,456fps  make!

As you can see from the video samples above the edgertronic SC2 is no slouch when it comes to quality and performance. We are now into Vision Research’s Phantom or Photron camera territory when it comes to frame rates.  This is of course at a bargain price compared.  You would have to pay anywhere from 5x to 10x the price of the edgertronic SC2+ to be able to acquire one of those cameras.

When you can record nearly 4,500fps at HD resolution the detail and time resolution of the subject increase to levels unimaginable to scientists just a couple of decades ago.  To have the ability to purchase a camera like this from 10k to 13k USD depending on the options is a milestone in high speed imaging history.

The original edgertronic now known as edgertronic SC1 available in color or monochrome for  $5,495 USD (8GB) version topped out when it comes to performance at 701fps 720p HD resolution, this new SC2 makes that frame rate look antiquated by comparison.  The 6.3x increase in frame rates now allow for analysis of many more physical phenomena in nature and or scientific experimentation. For industrial manufacturing users; the camera now can detect many more changes in the window of time allotted which can save valuable time and money in the engineering and troubleshooting of machinery.

The low price compared to other cameras also means that car crash tests and or other perilous situations can now be recorded more affordably than ever.   You could get 5 to 10 edgertronic  SC2 or SC2+ cameras  for the price of the competition and afford to loose a few in the name of science or art depending on your use.

edgertronic Software:

The software platform for the edgertronic SC2 and SC2+ is the same as the original camera which means you will interface through a web browser like Google Chrome in a very intuitive interface. “See our edgertronic review for details about the software” 

 The camera will function over the network interface which now has a very small lag in the live view preview. Recording and settings are easily changed and familiar to any previous edgertronic user.

 There will be new features added like user favorites or presets which will let you keep your most used settings in an easily accessible menu for recalling them on command. This will save time and will allow for consistency.  We will detail more of the features in a future post.

Software Version 2.2.0 Released Today also:
“Software Version 2.2.0 which adds several new features:

To update your camera, go to: http://wiki.edgertronic.com/index.php/Software_releases and follow the instructions carefully. As always, our software updates are FREE!”

“Video Overlay- New feature!
The edgertronic camera supports modifying the pixels in each video frame to overlay text and graphics. The video frames with the overlay applied are then encoded into a video file. There are different overlay features that can be individually enabled or disabled:

  • Overlay frame number
  • Overlay notes text with parameter expansion
  • Overlay settings
  • Overlay logo

The trigger frame is frame zero. Frames prior to the trigger event have a negative frame number and frames after the trigger frame have a positive number. The trigger frame is the frame that occurs coincident or immediately after the trigger input fall edge or trigger event. This delay of zero to one frame time will be recorded in the metadata file.”

Power Supply:

The edgertronic SC2 will consume slightly more power so the previous edgertronic SC1 power adapter will not be compatible with the new camera. The new sensor and electronics require a little more voltage to generate the performance necessary.   However as it is customary from edgertronic the kit will include the new power supply in the box.

12v portable power supply sources will still be supported and there will be no need to purchase a new portable battery pack like a Bescor for example.

A new option shared by Mike Matter the engineer and mind behind the edgertronic camera line is the Vagabond Mini™ Lithium (120VAC) Battery powered inverter by Paul C Buff.  With this relatively inexpensive pack, the edgertronic SC2 and SC2+ will be able to be used continuously for over 10 full hours on a single charge.   This is an excellent portable option for the camera and other gadgets you might need on the field.

edgertronic has done it again!

The first edgertronic camera changed the game by offering a true high speed camera taht delivered 701fps at HD resolution and up to 18,000 fps at reduced res for under $6k USD, unheard of at the time.  As of today it still graces the first spot on our high speed camera guide for price/performance in a slow motion capture device.

The edgertronic SC2 and SC2+ deal a near fatal blow to the price/performance scale with the HD 4,456fps at just 13k USD.  Other manufacturers should take note and be on their toes as the game has changed once again.  Powerful slow motion performance is now in the realm of small video producers, restricted scientific research and educators.

The edgertronic SC1, SC2 and SC2+ are available for purchase today and will ship in about 2 weeks from your order date.

HSC will receive an SC2+ color camera for review in the near future and we will be sure to put it through it’s paces and answer any questions that you might have regarding the capability and performance including other frame rates.

Thanks to Mike Matter of Sanstreak/edgertronic for providing the information and imagery for this post along with a review unit soon.

Visit edgertronic for pricing, ordering and full information on the SC1, SC2 and SC2+ cameras.     You can also order one here!