Tag Archives: DIY

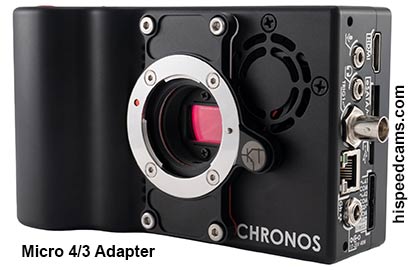
Chronos Camera m43 Lens Adapter with Speedbooster Support!

The two existing Chronos cameras, the 1.4c 720p at 1502fps & the Chronos 2.1 -HD 1t 1080p 1000fps are identical when seen from the outside but very different inside as they contain different sensor and memory boards. However one constant is that both use the C mount as the default for lens adapters. The camera usually comes with a Canon EF or Nikon F mount adapter depending on the buyer preference which screws on the C mount thread and allows for support of classic lenses from Macro to telephoto. 

One request from the community has been the support for other lens mounts like Micro 4/3ds which lets you adapt a variety of lens mounts and the much coveted speedbooster adapters which allow a 1 f-stop improvement in light gathering for micro 4/3ds systems. Today Krontech, the company behind the Chronos high-speed camera is introducing a passive Micro 4/3rds adapter for both the Chronos 1.4c and 2.1-HD and uses the body screw terminals near the lens thread mount to place a solid connection that allows such lenses. → Continue Reading Full Post ←

Cheapest slow motion camera for $6 does 660fps!

Cheapest slow motion camera

We just received a video link for a Raspberry Pi imaging platform that allows for 660fps slow motion video capture using the computing unit along with it’s memory and a $6 USD camera to record slow motion video with better than expected results. The video from 2019 by RobertElderSoftware explains the way the camera and R-Pi were able to capture the footage using some scripting and writing a windowed wide but not tall imaging rectangle directly to memory to create the cheapest slow motion camera.

Of note is the apparent low resolution of less than VGA at 640 x 64px and the somewhat appraisal of rolling shutter artifacts on some of the coins. However, RobertElderSoftware also has a step by step instruction video set on how to get a $40 Raspberry Pi computer and a  $6 USD camera module to build your own homebrew slow motion camera with some scripting.  After a lot of scripting and patience, you should be able to mimic his results.

Cheapest slow motion camera using a Pi Unit:

It is literally amazing what a dedicated engineer with an extremely limited set of tools and cameras is able to do on a project like this. Now imagine RobertElderSoftware using something like a more powerful ARM-based Mac M1 or similar with way more RAM disk for capture along with a better camera and sensor combination.

You can visit and subscribe to Robert Elder’s Channel here and learn many more from his cool projects and coding guides!

Maybe in the future, we could see some homebrew project kit that could be able to shoot 500fps or even 1000fps in 4k for a limited investment. In any case, we feel that you should take a look at the project below and get inspired.  We thank our reader Nacho Simon for the heads up on this awesome project and Mr. Elder for his creativity and drive! -HSC

Video Sample and Step by Step Guides Below:

World’s Cheapest High-speed Camera For $6 With 660FPS!? by RobertElderSoftware:

Part 1) How To Record Video At 660 FPS On A $6 Raspberry Pi Camera – Part 1 by RobertElderSoftware: → Continue Reading Full Post ←

Schlieren Imaging Slow Motion DIY!

Schlieren Imaging Slow Motion

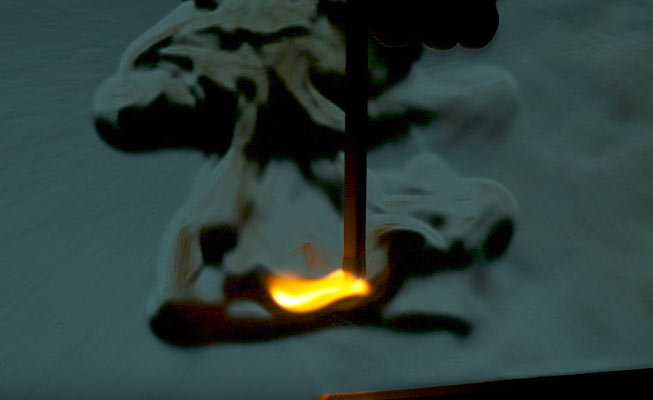
Sometimes all it takes to embark on a new project is some unexpected inspiration.  On the Incredible Slow Motion video by Veritasium – Seeing the Invisible: Schlieren Imaging in SLOW MOTION we are not only inspired but awestruck by the results of this simple and doable at home scientific experiment.   The experiment allows a camera to visualize the vortexes of gases and temperature differences in the air which serve to create some very interesting scientific experiments and or artistic visualizations.

You will need a Concave Parabolic Mirror like the ones used in reflective Newtonian telescopes, “you may have one lying around from your stargazing days”,  you will also need a small light source like an LED flashlight or single diode and finally a razor blade or similar precise object to cut off the light to the camera on a plane.

The video by Derek Muller goes into good detail about how to prepare your lab experiment and while you may need to tweak it several hundred times to get the best results it should be ready for experimentation without much fuzz and you should be able to try dozens of setups to shoot. Here is a site that helps you make your setup as well!

Seeing the Invisible: Schlieren Imaging in SLOW MOTION by Veritasium:

Schlieren Imaging Slow Motion:

Using a slow motion camera will also allow you to better appreciate the intricate patterns and disturbances in the air at room temperature like your breath or the cool air emanating from a beverage.  Using a small candle in front of the mirror could help you in setting up the experiment so you can tweak and look at your camera’s LCD monitor to perfect the positioning of the setup.

It is of note also that you will need a long lens to zoom into the mirror area and get the coverage of the shot you want.  Cameras that have long reach or interchangeable lenses and do good slow motion are plentiful like the Sony RX10 series ,Panasonic GH5, edgertronic, Chronos 1.4 and Sony a6500.

=&0=& (from German; singular “Schliere”, meaning “streak”) are optical inhomogeneities in transparent material not necessarily visible to the human eye. Schlieren physics developed out of the need to produce high-quality lenses devoid of these inhomogeneities. These inhomogeneities are localized differences in optical path length that cause light deviation. This light deviation can produce localized brightening, darkening, or even color changes in an image, depending on which way the ray deviates. First observed by Robert Hooke FRS !

Links to learn more about Schlieren Imaging:

Thanks to Derek Muller from Veritasium for inspiring us all.  You can help support his endeavors at: https://www.patreon.com/veritasium or subscribe at the Veritasium Youtube channel here!


amzn_assoc_placement = "adunit0";
amzn_assoc_search_bar = "true";
amzn_assoc_tracking_id = "hispeedcams-20";
amzn_assoc_ad_mode = "manual";
amzn_assoc_ad_type = "smart";
amzn_assoc_marketplace = "amazon";
amzn_assoc_region = "US";
amzn_assoc_title = "Things you may need for the experiment!";
amzn_assoc_linkid = "50e5c78cee26b4151dfa1e9ed98e7f4a";
amzn_assoc_asins = "B0012NFNEW,B0065822TI,B00KD3BRIS,B01NA7B2ZP,B01DLLJ8CU";