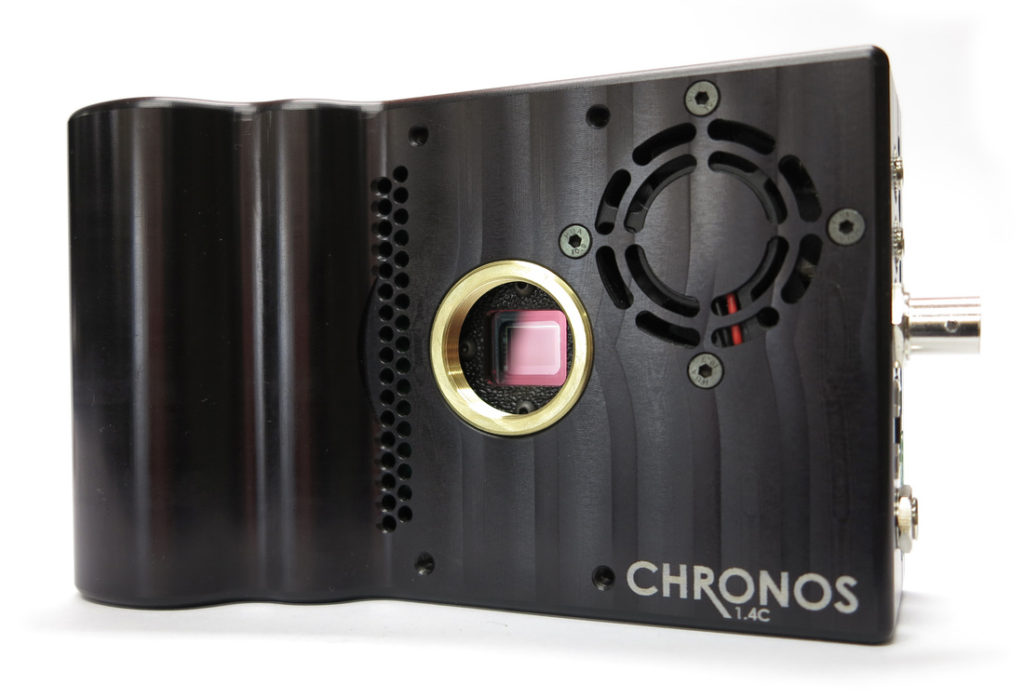
The Chronos 1.4c Team has been ramping up software releases with the latest v0.3 RC1 being dropped just a few hours ago. Be aware that this is not mission critical stable software so only use on your own testing and not for recording once in a lifetime events. The big fixes are in the color pipeline and how the camera handles pixel color especially red tones which were a little pinkish in previous software releases. It seems the entire color acquisition pipeline has received an overhaul. This should improve the color rendition on all objects plus the added benefit of less tweaking in post.
There are also several UI improvements like the ability to clear some warnings, move the button layout pane around the main interface screen and the ability to auto-save clips after shooting. HSC will be testing the new software and report back when we get some new images. We are preparing a color test to see before and after the software update and how much color has improved with the release.
Chronos 1.4 Software V0.3 RC1 Release Notes:
Here is the release candidate for V0.3, for those of you who want to try the latest and greatest. An updated manual is also attached to this post.
Keep in mind this software is still a release candidate. It has not gone through full validation yet, this software is generally stable but we don’t recommend using this for any critical applications where it’s not possible to recreate your shot. We recommend waiting for the final release for any applications that require guaranteed stability.
┌───────────────────────┐
┌┘ └┐
│ Chronos V0.3 RC1 Changelog │
└┐ ┌┘
└───────────────────────┘
Notable Changes (from V0.2.5):
– Colour reproduction is greatly improved especially reds
– Keyboard behavior improved, text is now selected when you tap an edit box
– UI can be flipped, or set to display the main screen menu on the left side
– You can configure the “Unsaved video in RAM” popup when you hit the record button with an unsaved video in memory. It can be set to “Always”, “If not reviewed” (default), or “Never”. The previous behavior was always “If not reviewed”.
– Fixed bug in 0.2.5 beta that resulted in a small portion of saves failing (about 2%)
– Fixed bug where segmented record mode would produce many invalid segments
More notable changes (from V0.2):
– Trigger I/O’s Trigger delay input was moved to the Trigger Delay screen.
– Added Trigger Delay screen and Record Modes screen, accessible from Record Settings.
– Black cal duration reduced by 10s to 15s or so at max resolution. (We still hope to make this much, much faster in a future beta.)
– Use any SD card. Previously, a class 10 SD card was required. You can now use slower cards. Of course, using a slower SD card means that videos save slower too.
– You can now auto-record after saving and auto-save after recording. This can loop.
Minutiae:
– Mark In and Mark Out have been renamed to Mark Start and Mark End, probably just until the video seek bar is made horizontal.
– Playback screen has ‘region to be saved’ marked. Each region saved is marked in a different color.
– The Enter key has been changed to say Apply, since you have to press it to apply your changes.
– The sliders on main screen the play screen have been made larger for ease of grabbing.
– There is now a Settings tab in the Util pages.
– Trigger IO window: The ratio between post-trigger frames and record length in frames is kept constant between resolution and framerate changes.
– Play → Settings: bitsPerPixel, maxBitrate, saved file framerate, format, filename and save location are now saved as soon as they are changed instead of when the Close button is pressed.
Installation instructions:
- Unzip the Zip file into the root directory of a FAT32 formatted USB stick
- This should result in a camUpdate folder in the root directory of the stick
- Boot up the camera and insert the USB stick
- Backup your calibration data. Tap “Backup calibration data” and wait for this to complete (about 5 seconds). The cal data is now backed up on the USB drive as cal_[serial number].tar
- To install the update, tap Apply Software Update
- A message box should pop up indicating the software update was found. Tap Yes to install the update.
- The screen will go black, you may see a screen saying “updating”, and the update will be installed. This will take about 30 seconds, potentially longer depending on the speed of the USB drive. There’s no feedback that anything is happening, just give it time. The camera will restart at the end of this process
- Done!
As always, let us know of any bugs you find, we’ll get them sorted out as quickly as possible. We anticipate the fully validated V0.3 release in about a month.
Download The new Manual & Software v0.3 RC1 Here at the official site: http://forum.krontech.ca/index.php?topic=158.0
For more information on the Chronos camera and where to get one see their official website here: http://www.krontech.ca
Sample Video – Forging in slow motion on Chronos 1.4 1500fps by Aki Korhonen:


